Tuesday 7 January 2014

Sores Dogan : Turkey


Whether you are an art and history buff, an archaeology nut or a nature lover, enjoy browsing through markets or going diving, the different regions of Turkey offer endless possibilities all year round. Each area has its own personality, history, landscape and even cuisine, and with so much on offer to visitors it is not surprising that one trip to Turkey is never enough.


Monday 30 December 2013

Sores Dogan : Vegetarian Turkish Classic


Here’s my take on a Turkish classic. Some shape this salad into patties, to create a
vegetarian version of the Lebanese dish kibbeh nayyeh (lamb and bulgur tartar), but I
prefer it loose, a bit like a couscous salad. In the south of Turkey, near the Syrian
border, they tend to use pomegranate molasses instead of lemon juice in their kisir. I use
both, and then go to town by garnishing the dish with pomegranate seeds, too. Serve with
fresh lettuce leaves, either as a starter or as part of a meze. Serves four.


2 large onions, peeled and finely chopped
90ml olive oil, plus more to finish
2 tbsp tomato paste
4 tomatoes, peeled and chopped
90ml water
400g coarse bulgur wheat
1½ tsp pomegranate molasses
1 tbsp lemon juice
6 tbsp chopped parsley
3 spring onions, finely shredded, plus an extra one to garnish
2 green chillies, deseeded and finely chopped
2 garlic cloves, crushed
1 tsp ground cumin
Salt and black pepper
Seeds from 1 pomegranate
1 handful mint leaves, some whole, some roughly shredded

In a large saucepan, sauté the onions in the oil until they turn translucent – about five
minutes. Add the tomato paste and cook over medium heat for two minutes, stirring all the
while with a wooden spoon. Add the chopped fresh tomatoes, leave them to simmer on a low
heat for four minutes, then add the water. Bring to a boil, remove the pan from the heat
and stir in the bulgur.

Add the molasses, lemon juice, parsley, chopped spring onion, chilli, garlic and cumin.
Season, stir, then set aside until the salad has cooled to room temperature or is just
lukewarm.

Taste, adjust the seasoning as necessary – it will probably need plenty of salt – and
spoon on to a serving dish. Roughly flatten out the salad with a palette knife, creating a
wave-like pattern on the surface, then scatter pomegranate seeds over and about. Drizzle
olive oil over the top and finish with the mint and the extra spring onion.


Sunday 27 October 2013

Sores Dogan : Root vegetable recipes


Root vegetable recipes: Turkish carrots and lentils

Serves four to six
You can serve it as a side dish, or as a main course with rice or bulgur wheat. It also makes a very good meze, served at room temperature with other ‘little’ dishes.
4 tbsp olive oil
Related Articles
Cooking with root vegetables 19 Feb 2010
How to make perfect French toast Santander
1 onion, cut into slim crescent-moon slices
4 cloves garlic,
finely chopped
1½ tsp coriander
seeds, crushed
½ tsp chilli flakes
100g (3½oz) green or puy lentils
6 large carrots, cut into rounds
2 tbsp tomato purée
2 tsp caster sugar
275ml (9½fl oz) water or vegetable or chicken stock
2 tbsp chopped mint, parsley or dill (or a mixture of two of these)
good squeeze of lemon
extra-virgin olive oil, to serve

Heat the oil in a saucepan and sauté the onion until it is soft and pale gold. Add the garlic, coriander seeds and chilli and cook for a further two minutes. Now add
everything else except the herbs, lemon and extra-virgin oil. Season, going easy on the salt if you are using stock rather than water. Bring to the boil and cook until
the carrots and lentils are tender and the liquid has been absorbed (top up the liquid if you need to). It should take about 30 minutes, but it might be a bit more.
The lentils should not become mushy but should retain their shape; green ones need extra vigilance. Taste, add whatever herb you are using and a good squeeze of lemon,
then taste again and adjust the seasoning. Add a good slug of extra-virgin oil. Serve at any temperature you like. Greek yogurt into which you have stirred some
crushed garlic is great on the side.

Friday 18 October 2013

Turkey Lasagna By Sores Dogan

Turkey Lasagna By Sores Dogan

Ingredients

Original recipe makes 4 serving
1 onion, chopped
2 stalks celery, chopped
1/2 teaspoon minced garlic
1 tablespoon vegetable oil
2 cups cooked and chopped turkey
1 cup cooked chopped broccoli
2 tablespoons butter
1/4 cup all-purpose flour
salt to taste
ground black pepper to taste
1 1/2 cups milk
1 (16 ounce) package instant lasagna noodles
1 cup shredded mozzarella cheese

Directions

  1. In a medium skillet saute the chopped onions, celery and garlic in oil until soft and tender. Add chopped turkey and broccoli. Set aside.
  2. To make white sauce: In a small saucepan over low heat melt butter or margarine. Remove from heat and add flour, salt, and pepper; and blend well. Return to low heat, whisk in milk and cook until thick.
  3. To assemble, in the bottom of a casserole dish place a thin layer of white sauce, then a layer of noodles. Next, place a layer of the turkey mixture, followed by sauce, and then 1/2 cup of the shredded mozzarella cheese. Repeat layering process with turkey mixture and sauce. Top with the remaining 1/2 cup of mozzarella cheese.
  4. Bake in a preheated 350 degree (175 degree C) oven for 45-60 minutes until bubbly and heated through. Let stand 10 to 15 minutes before serving.

Tuesday 15 October 2013

LIMONLU PEYKEK


LEMON CHEESE CAKE

Ingredients:

For the crust:
20 chocolate graham cookies ( finely crushed )
2 tbsp of salted butter ( melted )

For the filling:
16 oz cream cheese
3/4 cup of granulated sugar
Zest and juice of a lemon
2 eggs
1/2 cup of thick plain yogurt
2 tbsp of wheat starch

For the topping:
Juice of two lemon 1/2 cup of granulated sugar
2 tbsp of wheat starch


Preheat the oven to 325ºF.
Mix chocolate graham cookie crumbs and butter; press onto bottom of 8-inch spring form pan.
Beat cream cheese, 1/2 cup yogurt, lemon zest, lemon juice, 1 cup sugar and 2 tbsp of wheat starch with mixer until blended. Add eggs, 1 at a time, mixing on low speed after each just until blended. Pour over crust.
Wrap bottom half of pan in foil. Pour in filling; place in a roasting pan. Pour in boiling water to come halfway up side of spring form.
Bake for 1 hour minutes or until center is almost set.
Bring lemon juice, 1/2 cup of sugar and wheat starch to boil in saucepan on medium-high heat; simmer on low heat 8 to 10 min. or until sauce is slightly thickened stirring occasionally. Cool and pour onto cheesecake.
Refrigerate 4 hours. Remove rim of pan before serving cheesecake.

SORES DOGAN

Wednesday 2 October 2013

Classic Rack of Lamb

Classic Rack of Lamb (photo)

Classic Rack of Lamb

I live for lamb chops. Juicy, tender, rare (please please give me rare), deep reddish pink, browned, crusty, herbed, fatty goodness. So when my father sent me on a mission to make rack of lamb (what? 8 lamb chops in a row?) I was all over it. My version (with guidance from Mike the butcher at Corti Brothers) uses a simple rub with olive oil, garlic, salt, pepper, fresh chopped rosemary and thyme. The trick is to not go overboard with the herbs. The lamb tastes so good on its own, the seasoning should complement the lamb, not dominate it.

Beneath the recipe I’ve included links to rack of lamb recipes from other food bloggers, and a recipe for a breaded herb crusted version from chef Gordon Ramsay that my father likes. Do you have a favorite version? Please let us know about it in the comments.

Monday 30 September 2013

The Complete Guide to Cooking A Turkish Chicken


Over the past week, we’ve shared 
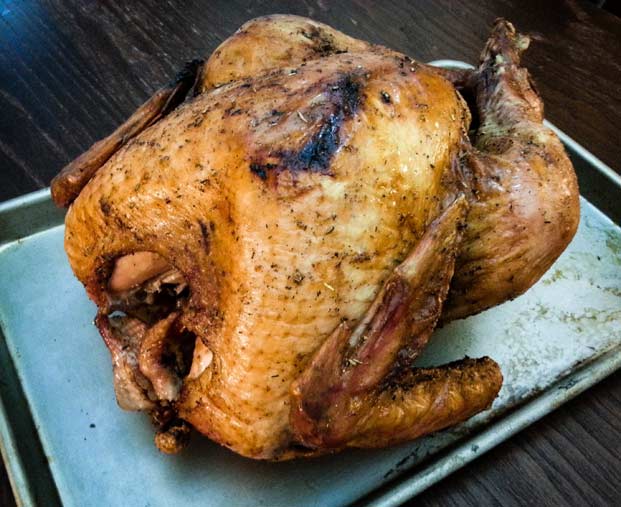
5 steps to help you get to a picture-perfect turkey. With Thanksgiving only 2 days away, it’s time to bring it all together into this post, our 2012 Complete Guide to Cooking a Turkey with everything from choosing to dry-brining to trussing, roasting, and carving in one place with step-by-step photos to guide you every step of the way.


It’s your year to be a Turkey Ninja, and we’re here to help.


Timing


The rest of this post goes into a lot of detail to make sure you’re well-equipped but if you want to set yourself a schedule ahead of time, here’s what to do:
2-3 Days Ahead: Wash, dry, salt, and season the turkey
Night before or morning of cooking: Remove from fridge, dry, and air-dry in fridge for at least 4 hours or overnight
1 hour before cooking: Remove turkey from fridge and allow to come to room temperature
Cooking: Estimate 15 minutes per pound
Resting: Allow 30 minutes
Carving & Crisping: 30 minutes


So, if you want to have dinner at 6pm, aim to have the turkey out of the oven at 5pm and work backwards from there.


Let’s get started.


Choosing a Turkey


First, we need to make sure that we’re starting with the right “raw materials” because our final product is only going to be as good as what we put into it. We wrote an entire post on how to choose your Thanksgiving turkey and our choice was afresh, natural, organic, free-range turkey. If you can afford to splurge on a heritage turkey, by all means do so, but what we recommend is a delicious bird that won’t break the bank. Regardless, our goal in this endeavor is to let the natural flavor of the turkey shine through so buy the best you can afford.


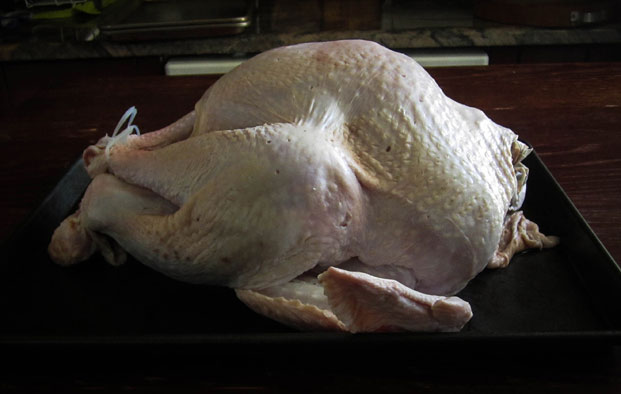
Prepping (2-3 days ahead)


Most store-bought turkeys come with a couple of things that we need to take care of. First, reach into the cavity and take out the neck (it looks like a long curved piece of bone with some meat attached. Set it aside. Then, you may notice a plastic or metal thing holding the legs together, which you need to remove. Unhook the legs then wiggle the hook around until it fully comes out.


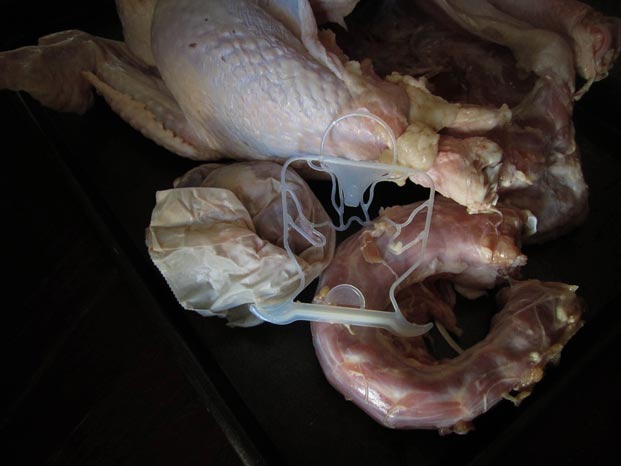
Next, turn the turkey with the legs pointing away from you and look for a little bag with the giblets (the heart, liver, etc.). Typically, this is stuffed inside of the neck cavity (which is now facing you), but sometimes it may be inside the main cavity. Either way, set it aside in the fridge if you want to use the giblets for gravy or just throw it away.


When you’re done, you’ll be left with your turkey and 3 other pieces – the plastic hook that holds the legs together, the neck, and a bag of giblets. Your turkey may also have a little plastic plug (what they call a “thermometer”) stuck into the breast. If it does, pull it out and discard.


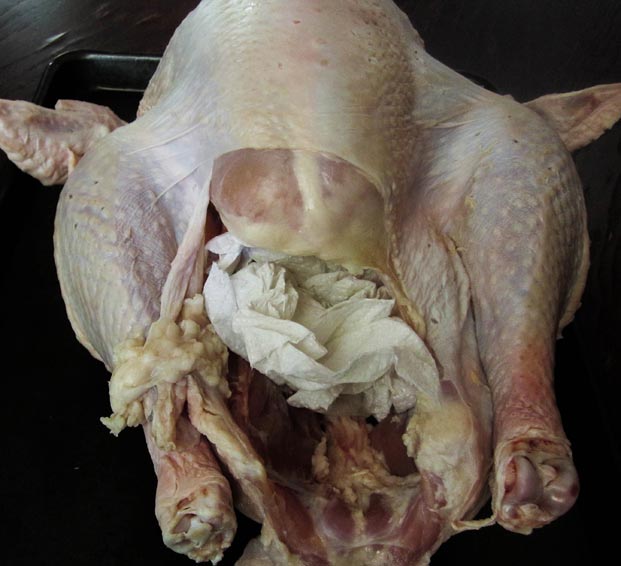
The next thing you need to do is thoroughly was your turkey inside out in the sink with cold water. It’s important to dry it completely, both inside and out. One of the tricks we use to make sure we get the inside totally dry is to stuff the cavity with paper towels and let it sit for a few minutes to absorb every last drip of water.


Dry-Brining


You’ll see a lot of guides out there that praise wet brining as the ultimate technique to getting a juicy and perfectly cooked bird. Don’t forget, there’s also the option to smoke or deep fry your bird (if you’re awesome like that) but for the right balance of final product quality (read: deliciousness) and realistic preparation, our technique for 2012 is DRY-BRINING. You can read all about dry-brining here but here are the basics.


Dry-brining is a technique of liberally coating your turkey with salt and spices for several days in the the fridge. During that time, the salt will penetrate the meat flavoring it down to the bone and causing it to retain its moisture, keeping it juicy during roasting. And, the salt pulls out all of the extra moisture in the skin, meaning that you’ll end up with crispy deliciousness. Here’s how to do it:


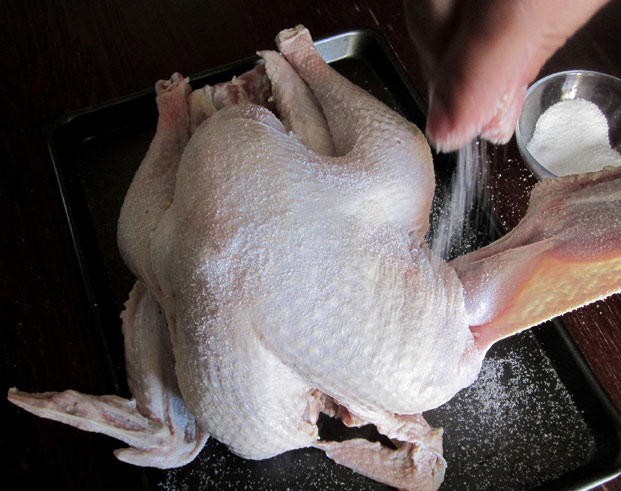
First, sprinkle your washed and dried turkey with a liberal amount of kosher salt.


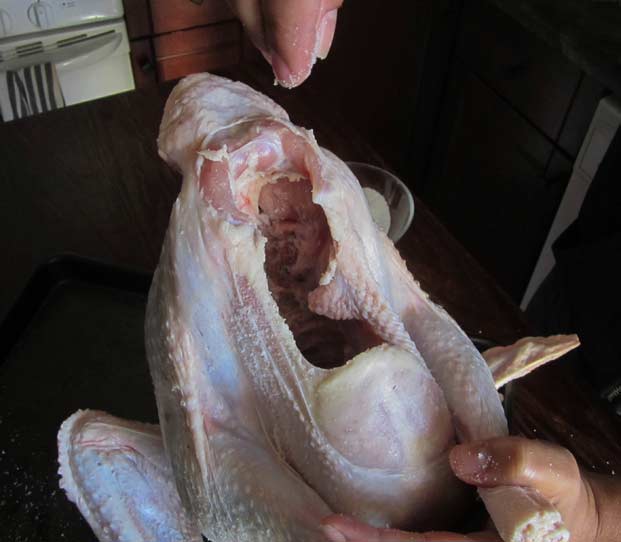
Don’t forget the inside as well.


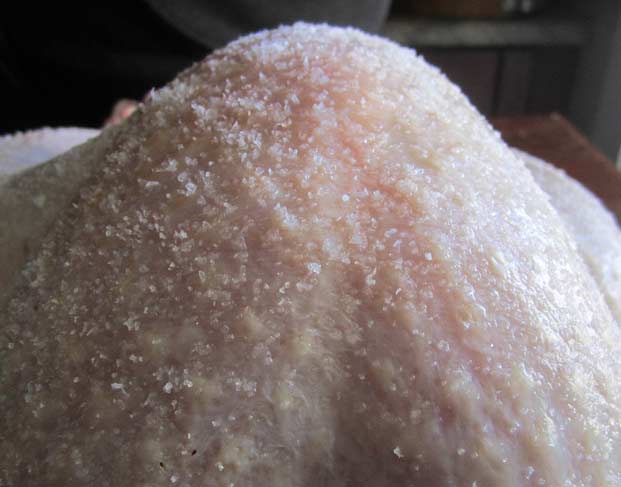
You want to make sure that you can see the granules of salt on the surface.


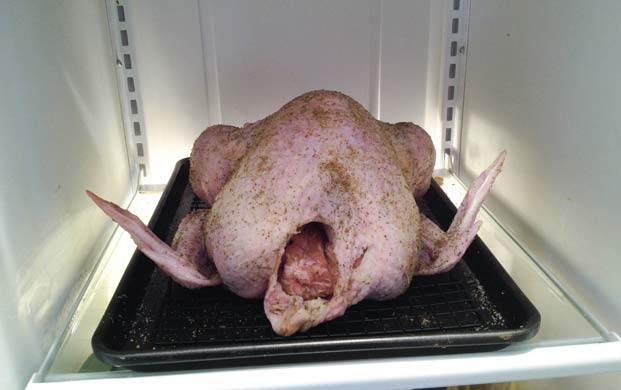
Then, add a coating inside and out of whatever dry rub you like. We used a combo of dried fennel, sage, thyme, and black pepper, but use whatever you like. Rub the spices into the turkey all over.


Put into a clean plastic bag (a brining bag works great for this) and store on a baking sheet or a plate on the bottom shelf of your fridge for 2-3 days. Turn the turkey over every day and drain off any liquid that may be released.
Air-Drying


The next step in the process is to make sure that the skin crisps up in the oven by ensuring that every last drop of moisture is out of the skin. On the morning of Thanksgiving, remove the turkey from the bag and pat dry with paper towels. It may be damp but it shouldn’t be dripping wet. Place the turkey back on a baking sheet or plate and refrigerate, uncovered, for at least 4 hours or up to overnight. The cold dry air of the refrigerator will evaporate any moisture that is left.


Remove the turkey from the fridge 1 hour before you’re ready to start roasting and allow it to come to room temperature.
Trussing


In order to make sure that the white meat and dark meat cook to the right temperature (and for a beautiful final presentation), trussing is the way to go. By tying up the turkey into a more compact package, the breast meat won’t overcook while the thigh is getting perfect. Here’s how to truss your turkey in under 3 minutes with butcher twine – you can do this as it’s coming to room temperature. No butcher twine? In a pinch, you can use unwaxed (and unflavored) dental floss.